Hi all,
This little tutorial is in response to a question posed in another thread, on how to change texture in pepakura viewer.
I will be using one of the cars designed by the Japanese designer Oniya, and his Porsche 962.
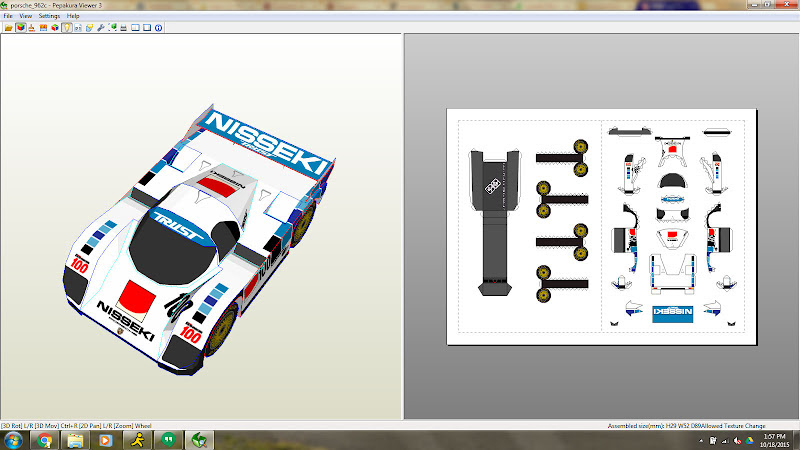
First view is the regular model, opened like any file in pepakura.
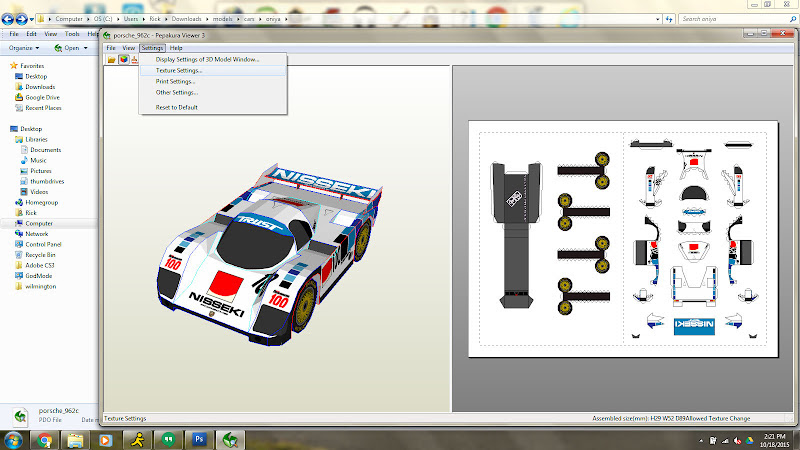
In order to get to the texture change panel, click on Settings tab at the top, and select Texture Settings
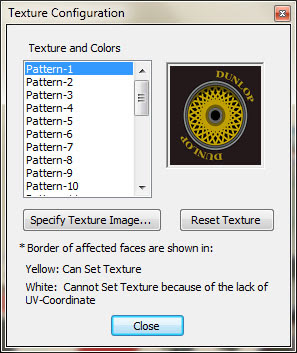
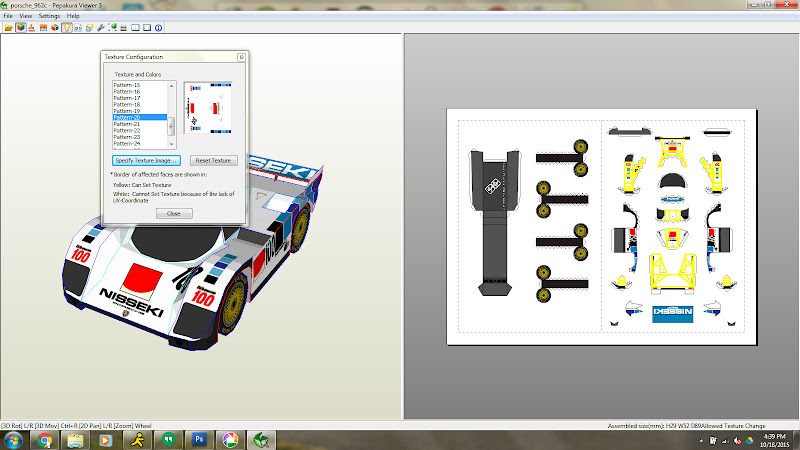
You then will be presented with the Texture Configuration window.
Using the Specify Texture Image, Windows Explorer will open, and all you need to do is navigate to where the other images/textures are stored, and you will see all of the textures and in my case, they have a number, which corresponds to each of the patterns on the original model.
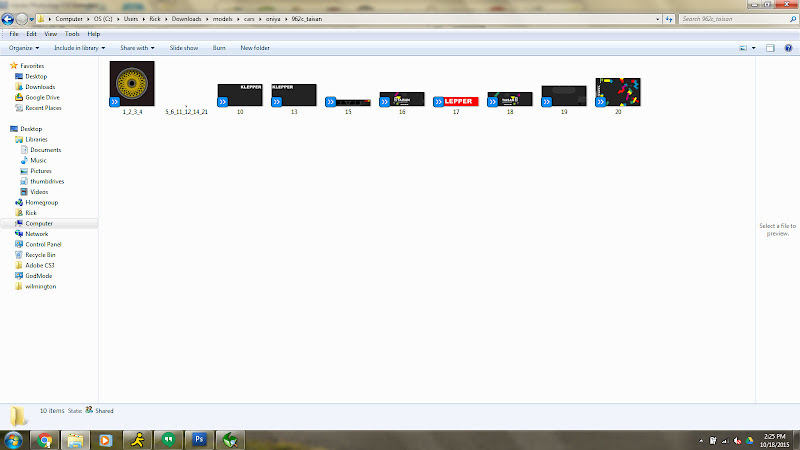
In the example, I will changing Pattern-20, which on the car represents most of the body work.
You will also see the parts on the model be highlighted in Yellow, indicating which pieces will get the new "paint job"
After you have applied the texture you wanted, the model will update showing the new graphics.
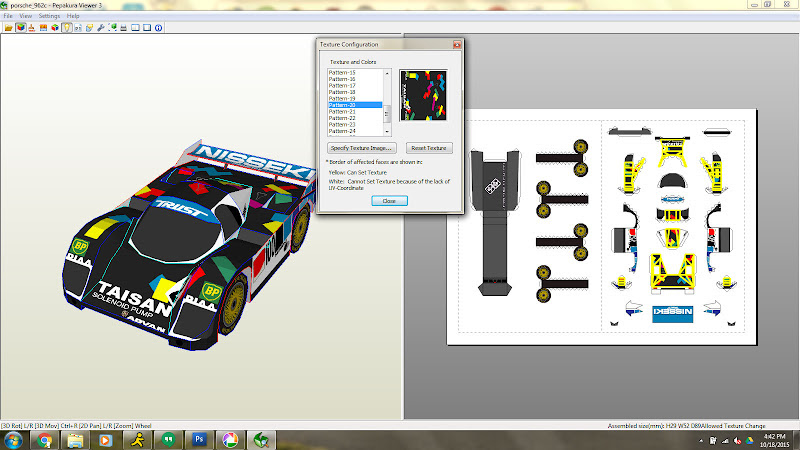
After you have applied all of the texture changes you want, you can print out the newly clad model.
I hope this helps, and if you have any questions, do not hesitate to ask, and I or someone else, will try and answer your questions.
If you want to see the pictures in a larger resolution, you can visit my album here http://ift.tt/1OCzyYz
Rick
This little tutorial is in response to a question posed in another thread, on how to change texture in pepakura viewer.
I will be using one of the cars designed by the Japanese designer Oniya, and his Porsche 962.
First view is the regular model, opened like any file in pepakura.
In order to get to the texture change panel, click on Settings tab at the top, and select Texture Settings
You then will be presented with the Texture Configuration window.
Using the Specify Texture Image, Windows Explorer will open, and all you need to do is navigate to where the other images/textures are stored, and you will see all of the textures and in my case, they have a number, which corresponds to each of the patterns on the original model.
In the example, I will changing Pattern-20, which on the car represents most of the body work.
You will also see the parts on the model be highlighted in Yellow, indicating which pieces will get the new "paint job"
After you have applied the texture you wanted, the model will update showing the new graphics.
After you have applied all of the texture changes you want, you can print out the newly clad model.
I hope this helps, and if you have any questions, do not hesitate to ask, and I or someone else, will try and answer your questions.
If you want to see the pictures in a larger resolution, you can visit my album here http://ift.tt/1OCzyYz
Rick
Aucun commentaire:
Enregistrer un commentaire